Edit a Pet / Pet Report
Once a pet is added you'll see the pet on the main screen with basic information listed.
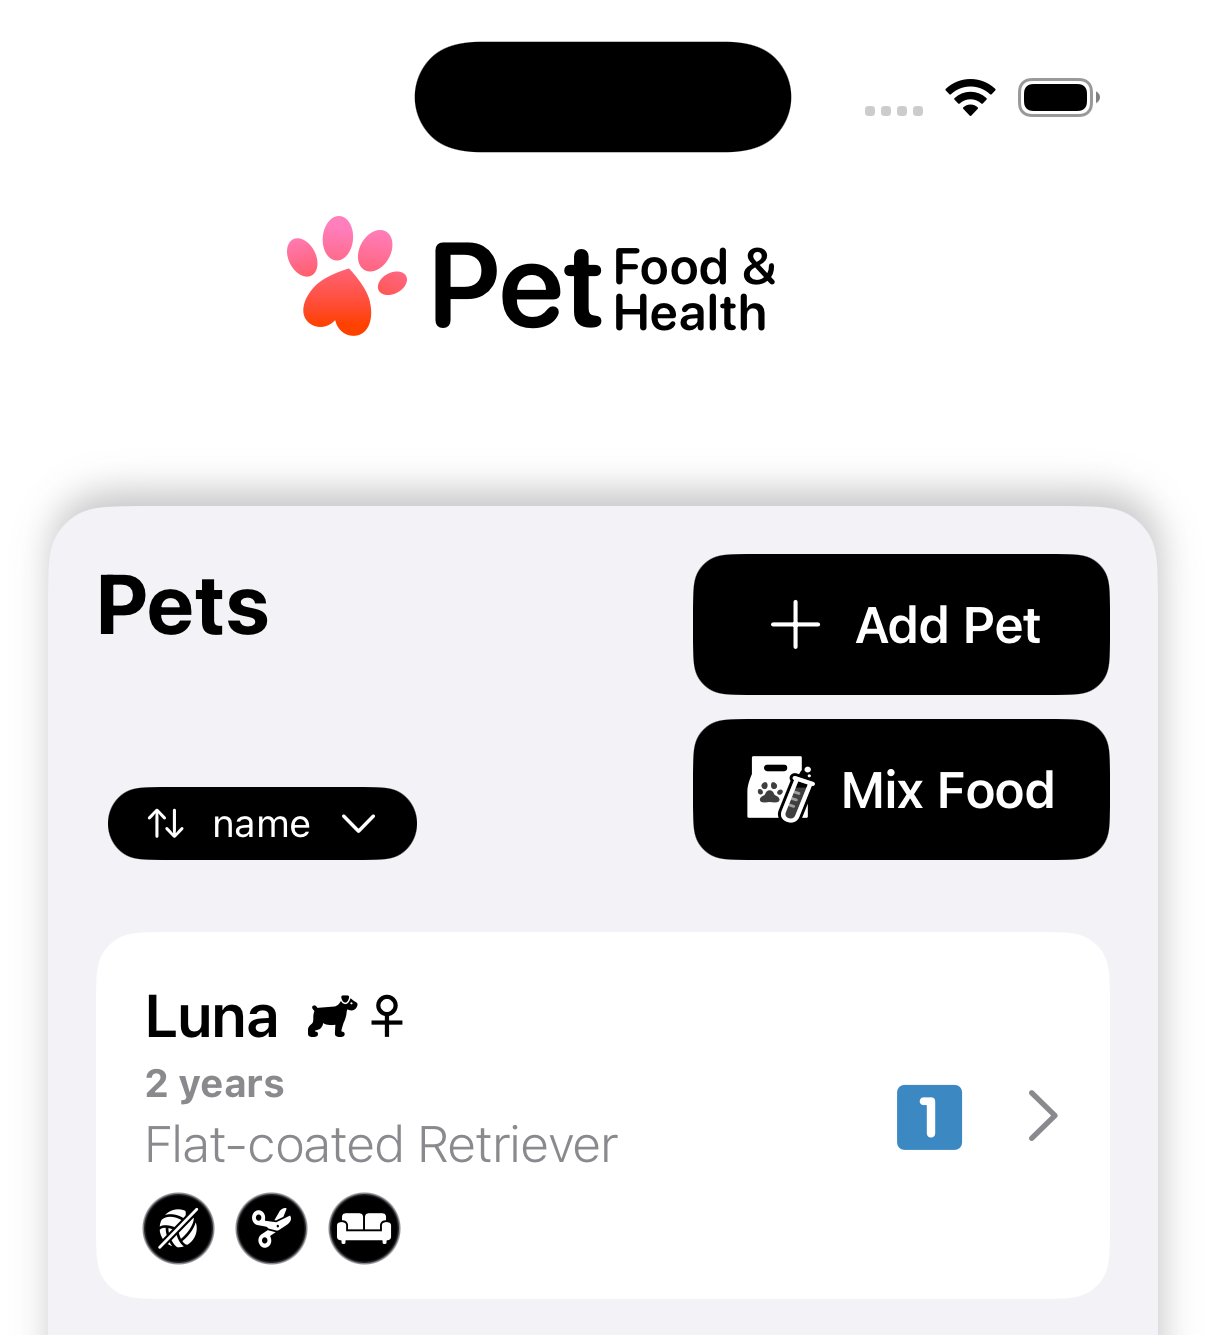
Tap on a pet card
 to open the pet details page.

The pet detail page shows you more information on your pet
 . In addition, through this page, you can edit the pet details
 , create reports
 , or check up on – and add – medication for this pet
 . To edit a pet, either tap on the Lifestyle and Food button below the pet details, or tap on Edit in the top right corner.
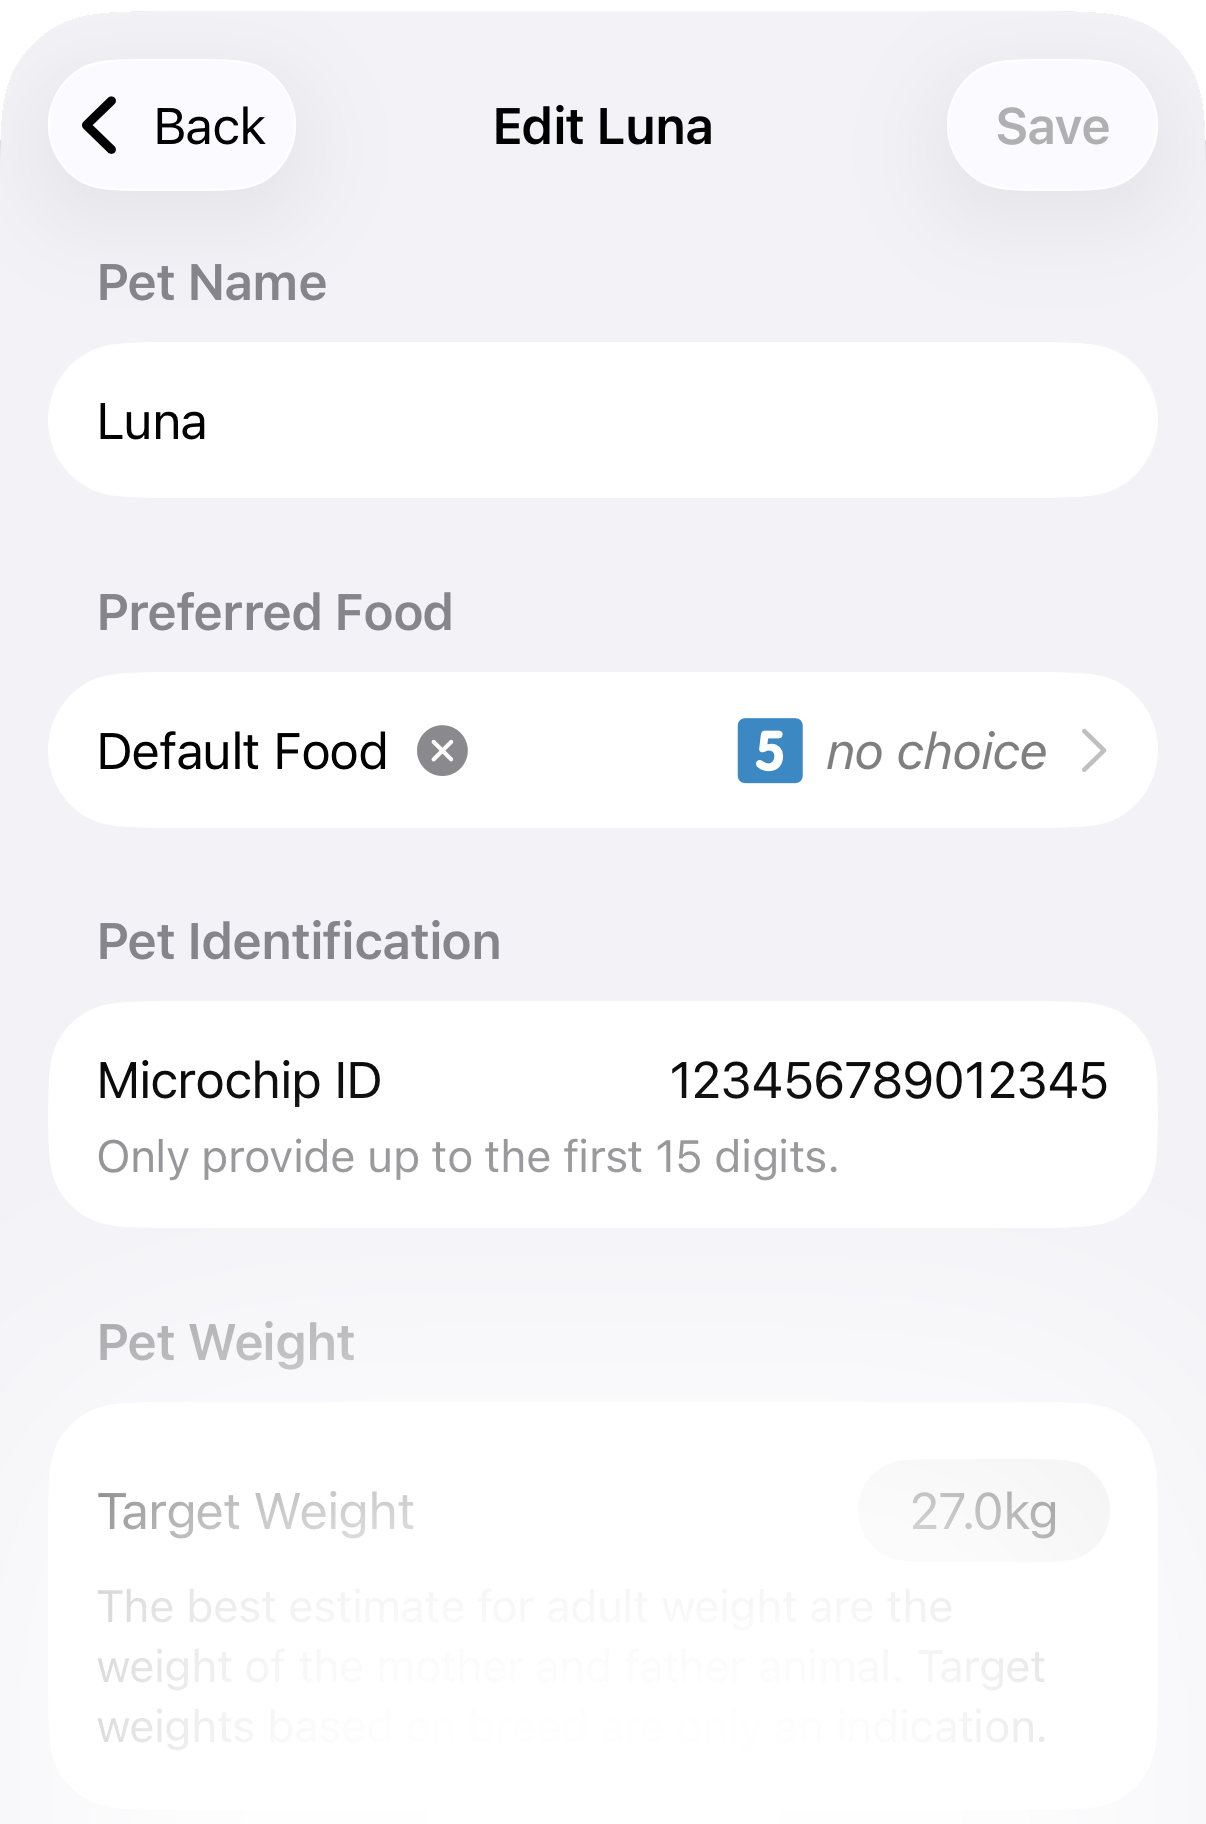
When editing a pet you see a screen similar to the one for adding a new pet. The listed values can be changed as you prefer – don't forget to Save after editing!. One thing still to do after adding a pet is to set up their routine food. To do so you can tap on the Default Food box
 .
.
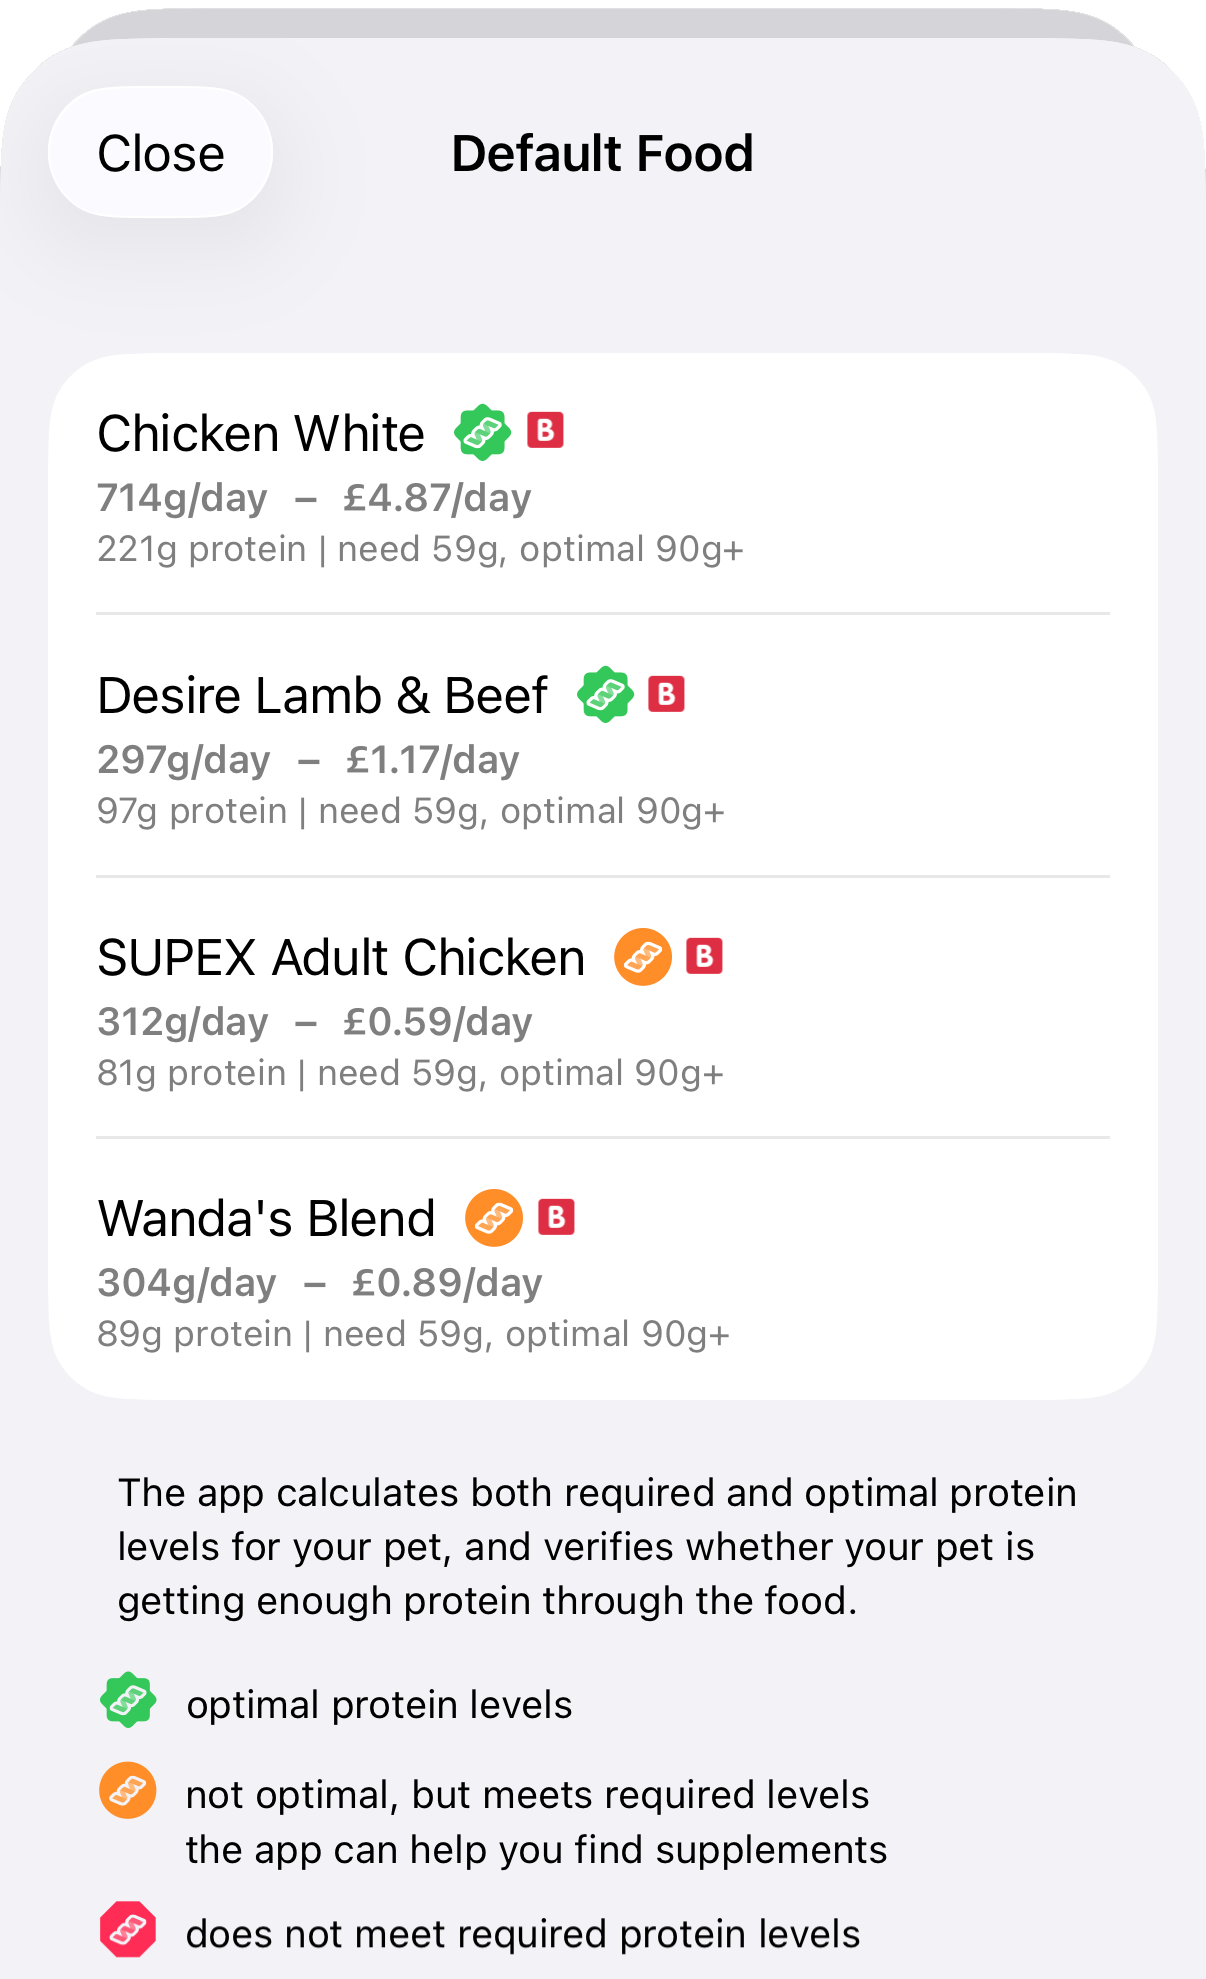
When selecting a food for your pet you can see that the app already provides an evaluation tailored to your pet
 . The app analyses – based on your pet's details and lifestyle – the needed calories and how many proteins each food provides at this intake level. It then scores each food based on a traffic light system. Foods with a green/badge mark are excellent picks. Foods with an orange/circle mark are good picks that can be improved. Foods with a red/danger mark are poor picks.
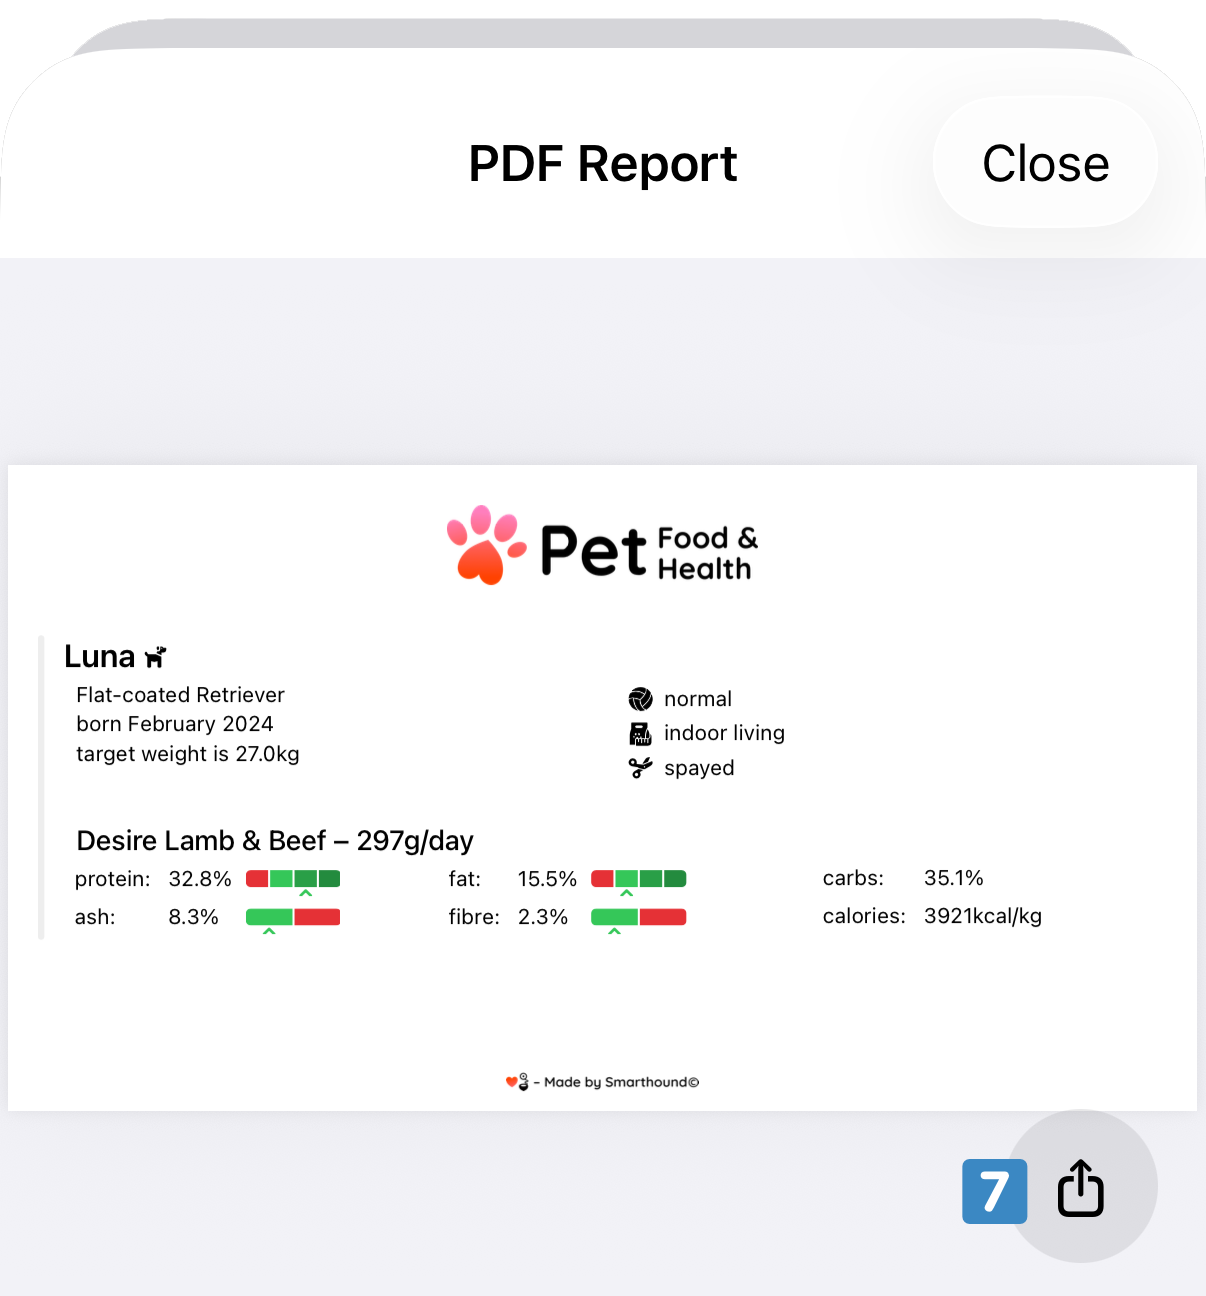
After selecting a food, or when tapping Done, the app returns to the pet details screen. From this screen you can also create reports specific to this pet
. Reports are a powerful feature that allow you to create printouts with a bird's-eye view of all the information related to your pet. You are in full control here; you can choose what is, or isn't, included in a report.
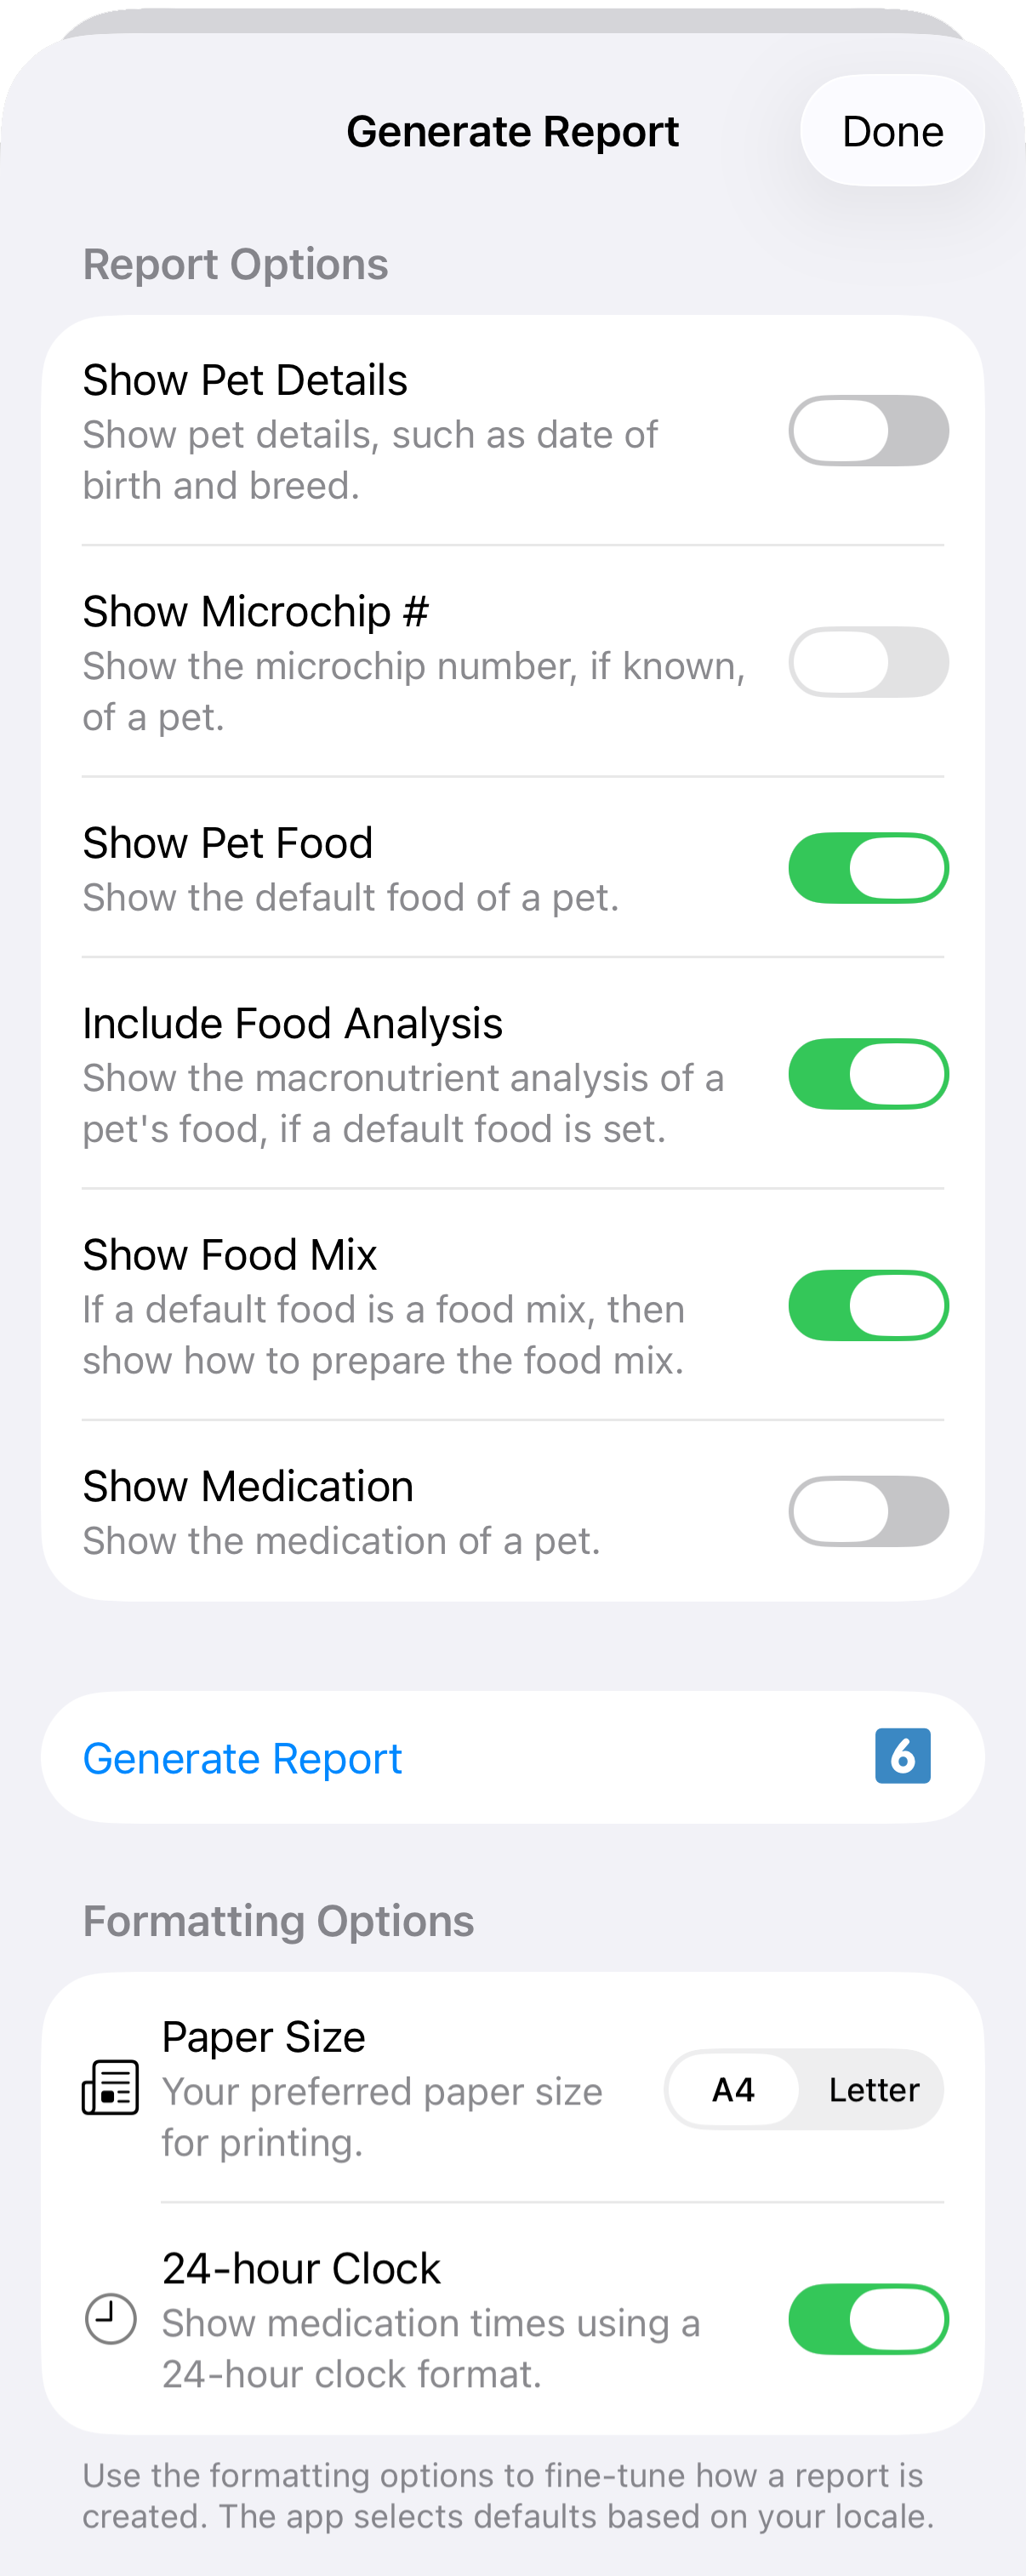
Once you selected the options you want for the report you tap on Generate Report
 . A new report is instantaneously generated for you and ready to view. If you want to share the report, or if you want to store it as a PDF for printing, use the export menu option
 .
.